How to Hang Christmas Lights
by

‘Tis the season to celebrate cultures, honor family traditions, and spread holiday cheer. Regardless of our different customs, most Americans can agree on one thing: Christmas lights are pure joy. There’s nothing that brings a nostalgic smile to our faces, or a Bing Crosby song to our lips, quite like a home decked out for the holidays.

If you’re wondering how to put Christmas lights on a house, here are 6 STEPS to doing it right without damaging your roof, your siding, and most importantly – YOU.

STEP 1: CREATE A PLAN

Take a moment to step back, look at your home from across the street, and map out a lighting gameplan.

Get Focused

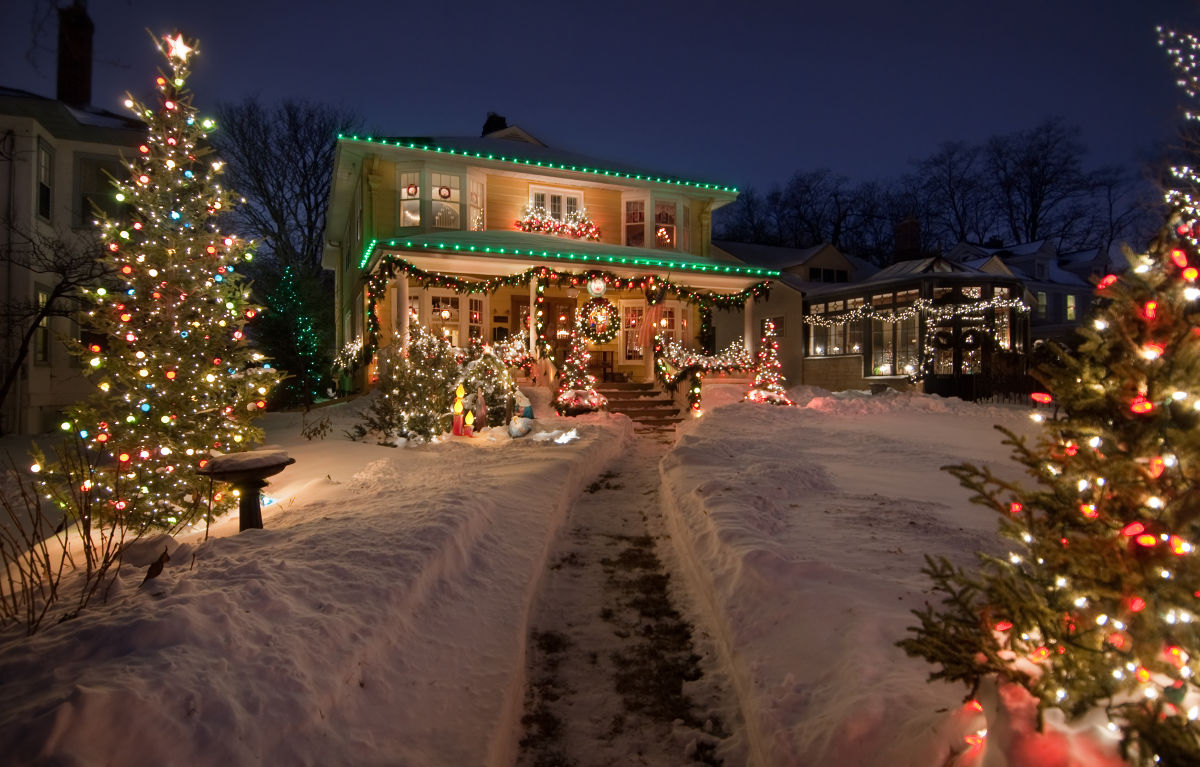
Is there potential for a focal point? If yes, plan your lighting design around the featured element to draw people in. Consider outlining your front entry, wrapping porch columns, showcasing holiday characters on the front lawn, or highlighting a perfectly shaped pine tree in your landscaping. Lighting designs that lack a focal point can feel random and less appealing.

Good Measure

Next, measure the parts of your home you wish to decorate to determine the feet of light strands needed. Measure along any rooflines, windows, doors, deck railings, shrubs, trees, and pathways included in your plan. If you find it hard to measure around pillars and up trees, Bob Vila has some good tips for measuring these tricky areas. Don’t forget to measure the distance to your power source, too.

hanging holiday lights create focal point

Accentuating a clear focal point, like a front door, will draw people in.

christmas lights example

With so many lighting options to choose from, pick the look that’s right for you.

STEP 2: CHOOSE YOUR LIGHTS

With countless Christmas lights on the market, how do you choose? Before you go shopping, it’s a good idea to think about the kinds of lights you prefer, and the overall effect you’re hoping to achieve this year.

Color Options

Do you want to use white lights that are clean and timeless, color lights that are fun and festive, or a combination of the two? If you’re going with white, just remember that not all white lights are the same – some are a cool blue, while others are a warm yellow. Be sure to closely read the packaging if you want your white lights to match.

 LED vs. Incandescent Bulbs

Bulbs come in a variety of sizes, from mini fairy lights, to strawberry-shaped bulbs, to even larger colored spotlights. When choosing between LED and incandescent bulbs, it’s important to weigh the pros and cons, including potential costs to your safety, your wallet, and the environment. If you think it might be time to switch from incandescent to LED lights, this article by The Spruce can help you make an informed decision.

What About Solar?

The ultimate energy-saving option, hands down, is solar-powered Christmas lights. Solar lights help you reduce your carbon footprint, eliminate the need for clunky extension cords, and can provide beautiful displays as long as you have abundant sunshine. And therein lies the rub: solar lights are great when the skies are clear, but many fail to shine when the weather turns cloudy. Knowing this, some newer sets come with USB ports so you can recharge your lights in a pinch.

christmas candy cane path lights example

Pathway lighting is both fun and functional.

Task Lighting

It’s important to choose the right type of light for the task at hand. String lights are great for straight lines as well as wrapping around columns for that candy-cane effect. Icicle lights look terrific hanging from eaves and rooflines. Net lights make it easy to evenly cover shrubs. Pathway lights with lawn stakes are terrific along sidewalks. And spotlights are a safe and colorful solution for large trees that may be tricky to decorate with light strands, especially when trying to reach the upper branches.

How Many to Use?

That depends on the look you’re going for. Do you prefer something subtle, soft and twinkling? Or a showstopper display you can see from space? According to home-improvement retailer Lowes, “A good rule of thumb is 100 lights for every 1-1/2-ft of tree or shrub you want to cover. So, a 6-ft evergreen needs at least 400 lights for a basic level of lighting.” For a more dramatic effect, the retailer suggests simply doubling up and staggering a second set of lights, or using strands with lights spaced more closely together. “Denser lights equal brighter lights.”

Once you choose your lights, then revisit your plan and your measurements to figure out how many strands, nets, ropes, or spotlights are needed.

STEP 3: CHOOSE THE RIGHT CLIPS

Nobody wants to damage the exterior of their home while decorating for the holidays. Here are some tried-and-true methods for safely hanging lights on different surfaces.

Gutters and Shingles

If you want to know how to hang Christmas lights without gutters, or with gutters, or under asphalt shingles, a great solution is the universal light clip. These inexpensive plastic clips are touted as being freeze-proof, wind-proof, and specifically designed to hang Christmas lights without damaging surfaces. They can hook onto the lip of your gutter, or slide under your shingles, with built-in clips to hold large and small light sockets in place.

If you’re thinking about replacing your roof, read this first.

gutter christmas lights clips example

Plastic light clips are a great choice along gutters and rooflines.

Vinyl Siding

Many of our clients want to know how to hang Christmas lights on vinyl siding. Vinyl siding clips are the best solution. Simply slide the clips under the vinyl siding, and you’re ready to decorate. The stainless-steel clips are easy to reposition, and they won’t rust or stain your vinyl siding. Once the holidays are over, removal is easy and damage-free.

Interested in protecting your home with worry-free vinyl siding? Contact B&B Siding and Roofing for a no-pressure consultation.

Metal Surfaces

There are several ways to hang Christmas lights on metal roofing, siding, and even some flashing. Your best four options include: 1.) magnetic light clips, 2.) outdoor adhesive light clips, 3.) the universal plastic clips mentioned earlier, or 4.) using strands of lights with built-in magnetic sockets. It’s important to remember that magnets work on metal that contains iron, such as steel, but not on copper or aluminum surfaces.

Hard to Decorate Places

Outdoor adhesive clips work well for pillars and columns. For front porches, try plastic zip ties, or wider plastic clips made specifically to hang lights and garland from standard deck railings. Use yard stakes for pathway lights and for spotlights on trees. Speaking of trees, instead of wrapping light strings around individual tree branches, purchase tree clips to hold lights in place (and save your sanity).

As a friendly reminder, never use staple or nail guns to attach Christmas lights to your house. You could end up ruining your lights and putting permanent holes in your home’s exterior.

STEP 4: PREP YOUR MATERIALS

We’re just one step away from putting your lighting plan into action. But first …

Test Everything

It’s absolutely essential to test all of your lights, on the ground, before you hang a single strand. Test them with the extension cord, any adapters, and the electrical outlet you plan to use for the display. If you’re pulling lights from storage, check for frayed strands and burned-out bulbs. Change fuses if needed. Plug in each individual strand, old and new alike. Even brand-new lights can be defective. Also keep in mind that you can typically connect up to 25 strands of LED lights, compared to six strands (at most) of incandescent lights, before blowing a fuse on the strand.

Gather Your Supplies

In one central location, gather everything you need to hang your Christmas lights:

  • lighting design plan
  • measuring tape
  • outdoor Christmas lights and any other décor you plan to use
  • exterior-rated extension cord
  • non-damaging clips to hang lights and décor
  • sturdy ladder
  • light-hanging pole (if needed)
  • electrical tape or duct tape
  • lighting timer
hanging christmas lights with kids

Christmas lights make us all feel like a kid again.

STEP 5: HANG YOUR LIGHTS

You planned your display, selected your lights and clips, and gathered all your supplies. Now you’re ready to hang! Try to start early enough so you don’t run out of daylight, and choose a day with mild weather.

Safety First

As with any DIY project, we always stress safety first. When using a ladder, it’s smart to work with a partner and review the safe-ladder practices recommended by the National Safety Council. In addition, The Home Depot offers the following tips for how to hang Christmas lights on a roof peak:

  • Do not attempt to install Christmas lights on your roof when it’s rainy or snowy.
  • Place an extension ladder securely against the side of your house and on level, firm ground.
  • Have your partner hold the ladder to help keep it in place when you climb.
  • Keep your hands free while you’re climbing your ladder.
  • Use a tool belt or bag to hold all your supplies while you climb.
  • Plastic clips are the easiest way for hanging Christmas lights on the roof.

If ladders give you the willies, use a light-hanging pole for hard-to-reach places, like awkward eaves, roof peaks, or upper tree branches. Make sure all lights, extension cords, and adapters are rated for outdoor use, and tape down any cords that may pose a tripping hazard.

More Installation Tips

Begin at the roof peak and work your way out along the eaves, attaching the lights with clips every six to twelve inches. When decorating columns, start at the top and work your way down, keeping tension as you diagonally wrap the strand around the pillar. Again, use clips that are best-suited to specific lights and the surfaces where you plan to hang them.

As an added moisture barrier, wrap some electrical or duct tape around the plug where individual strands connect, and at the open terminus of the last strand. Consider a timer to save energy, or a daylight sensor that will automatically turn lights off and on at dawn and dusk.

Credit Warner Brothers

STEP 6: MAKE A GRAND REVEAL

Your creativity, planning and hard work deserve a celebration! Whether it’s an epic Clark Griswold Hallelujah Chorus moment, or a quiet memory to treasure with a small circle of loved ones, have fun revealing your masterpiece to your friends, family, and the neighborhood. If you’re craving a social connection, consider an outdoor block-lighting ceremony with your neighbors where you all flip the switch at the same time for the big reveal. Or perhaps submit your address as part of a community holiday lights tour.

Whatever you do, take pride in your boundless holiday spirit and that sparkling Christmas light display you created. It’s sure to bring a smile to many faces, and pure joy to the world.

At B&B Siding and Roofing, we give accurate estimates and stick to them.

If you’re in New Jersey or Staten Island contact us any time you need a quote for a siding, roofing, window, door, or gutter project!


Like this article? Sign up below to receive more useful tips, ideas, news, and more from B&B.

  • This field is for validation purposes and should be left unchanged.